Arduino Paper Piano

-
Arduino UNO board + USB Cable
Paper
Scissors
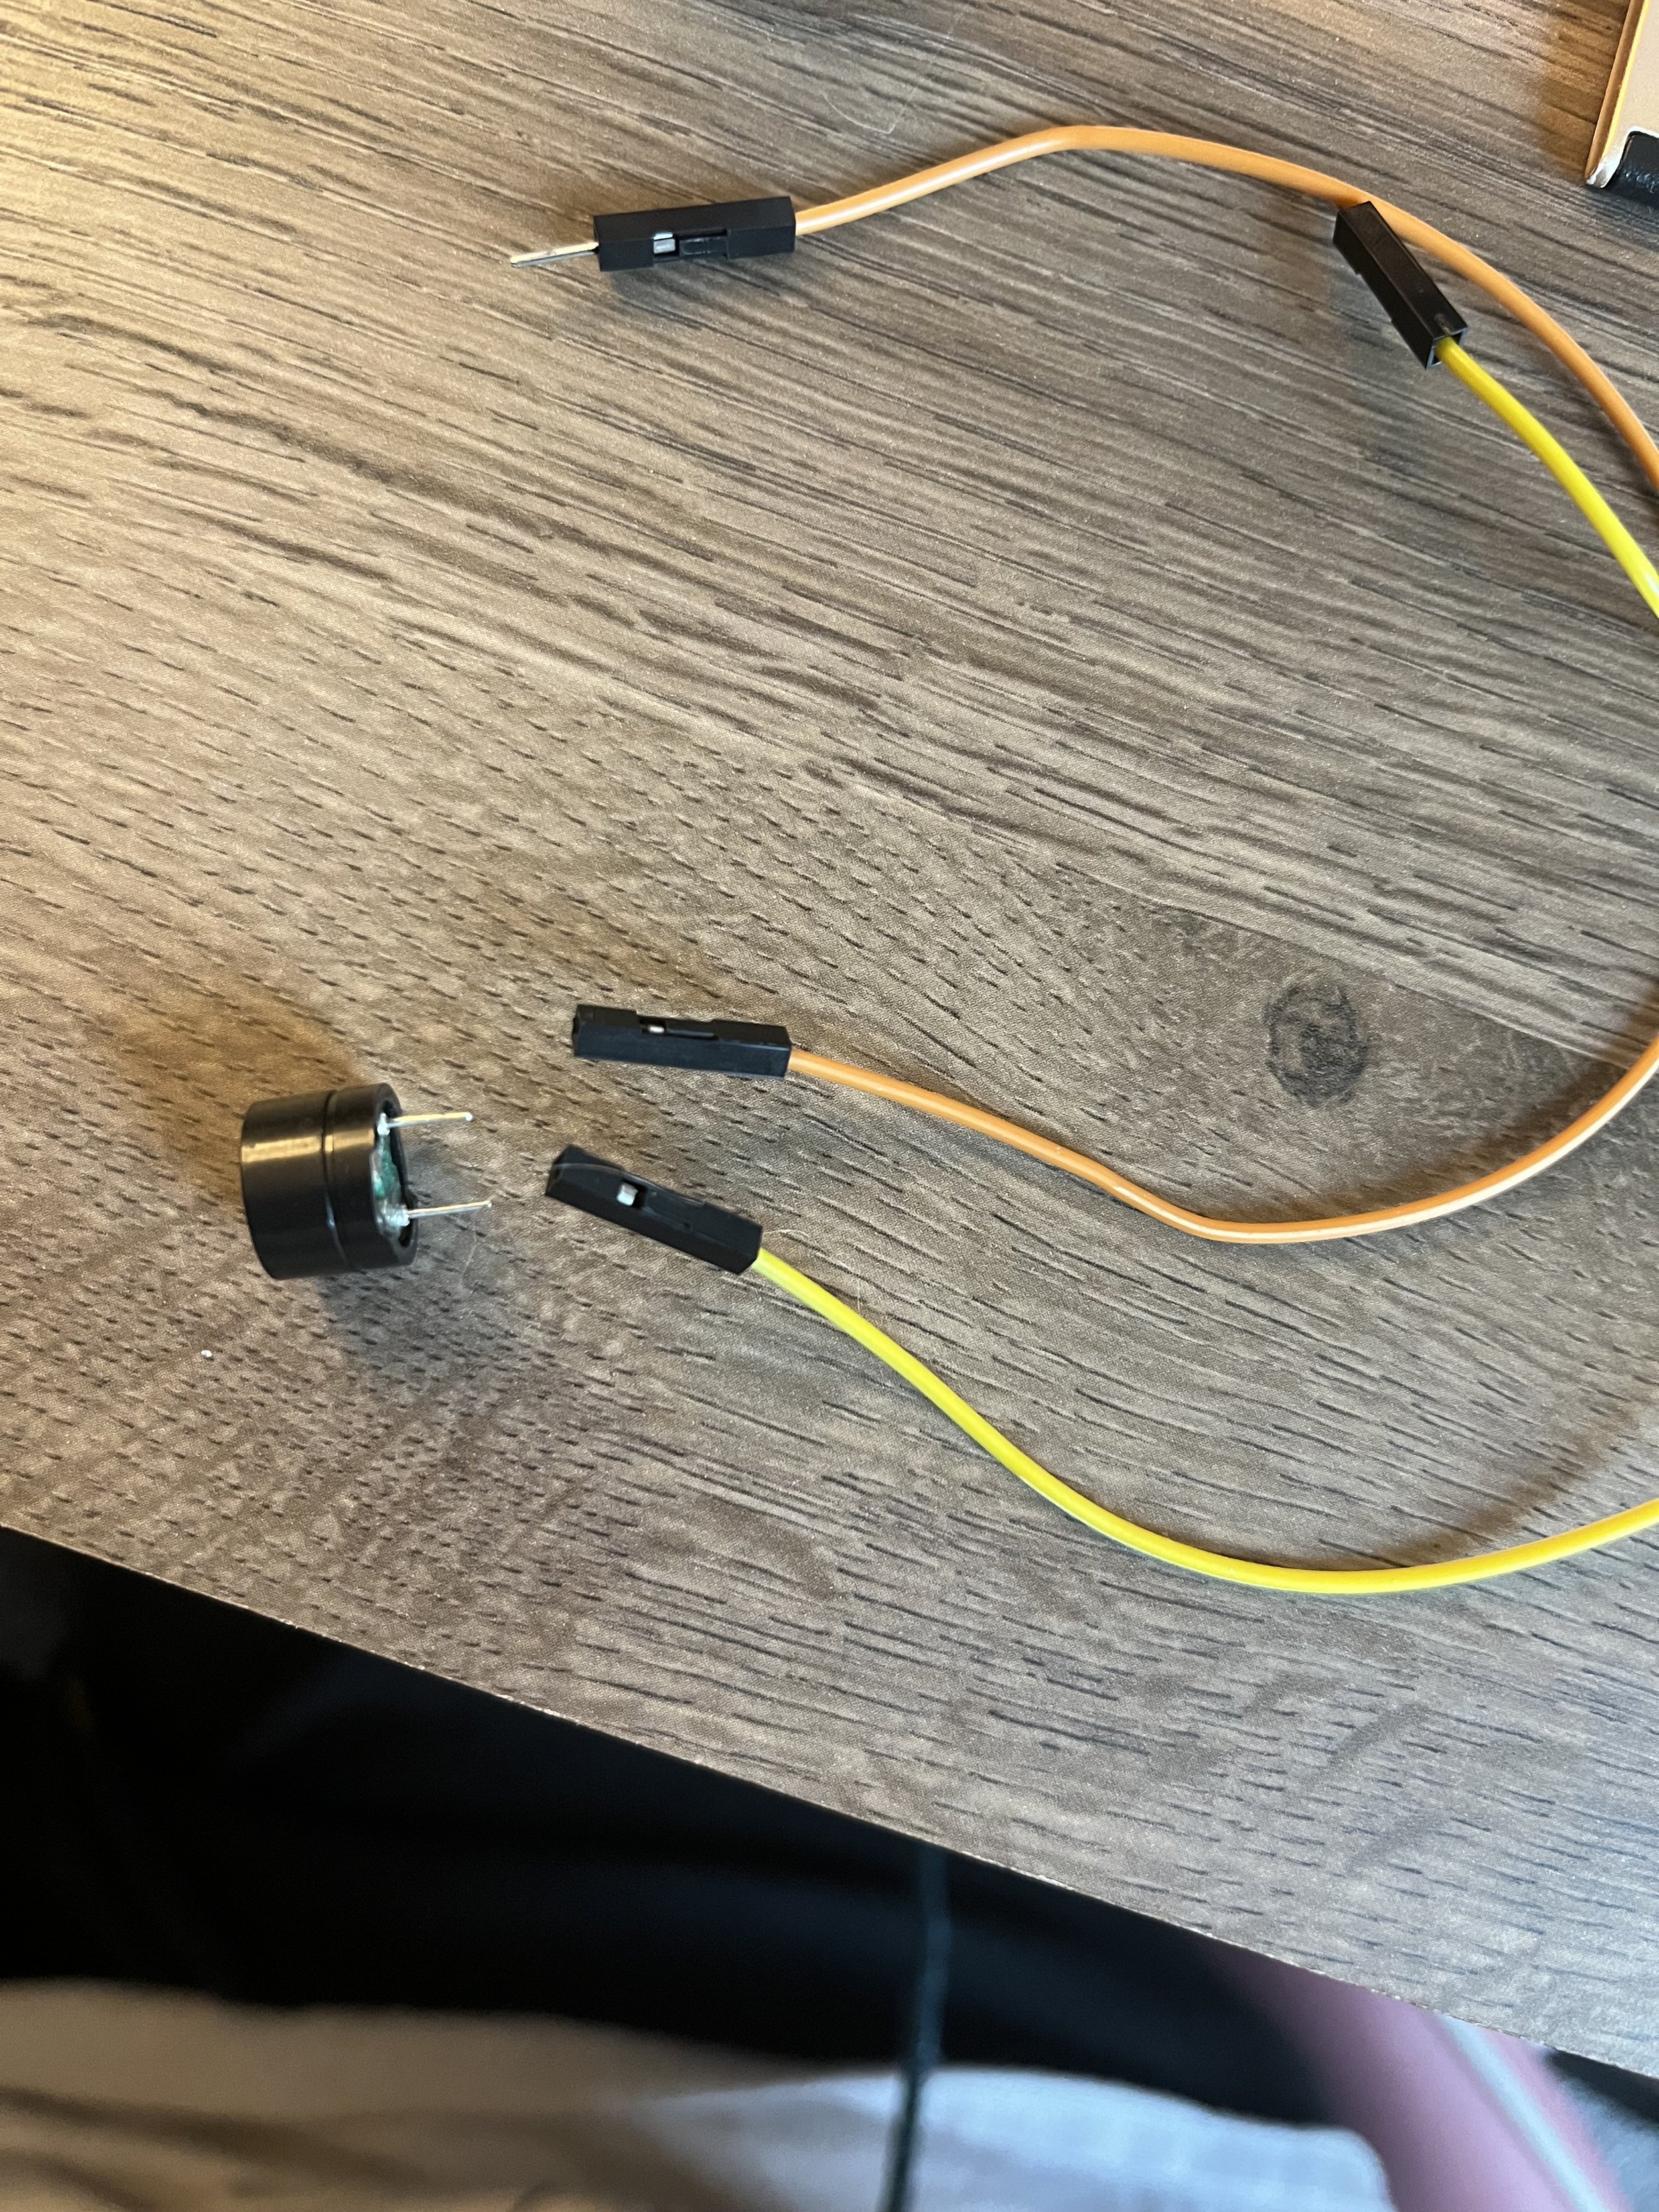
Passive Buzzer or Speaker
Passive buzzer connected to pin 9 (positive) and GND (negative). on the Arduino Board
Jumper Wires
Copper tape (conductive adhesive tape)
Long strips of copper tape serve as piano keys.
Each strip connects to an Arduino input pin.
One shared strip of copper tape is connected to GND.
Students touch both the ground strip and a key to complete the circuit.
-
//This Code was developed by and for STEMNetX Arduino Programs
#define Tone_Note1 220
#define Tone_Note2 330
#define Tone_Note3 440
#define Tone_Note4 550
#define Tone_Note5 660
int Note1 = 2;
int Note2 = 3;
int Note3 = 4;
int Note4 = 5;
int Note5 = 6;
int Speaker = A0;
void setup()
{
pinMode(Note1, INPUT);
digitalWrite(Note1, HIGH);
pinMode(Note2, INPUT);
digitalWrite(Note2, HIGH);
pinMode(Note3, INPUT);
digitalWrite(Note3, HIGH);
pinMode(Note4, INPUT);
digitalWrite(Note4, HIGH);
pinMode(Note5, INPUT);
digitalWrite(Note5, HIGH);
}
void loop()
{
while(
digitalRead(Note1) == LOW)
{
tone(Speaker,Tone_Note1);
}
while(
digitalRead(Note2) == LOW)
{
tone(Speaker,Tone_Note2);
}
while(
digitalRead(Note3) == LOW)
{
tone(Speaker,Tone_Note3);
}
while(
digitalRead(Note4) == LOW)
{
tone(Speaker,Tone_Note4);
}
while(
digitalRead(Note5) == LOW)
{
tone(Speaker,Tone_Note5);
}
noTone(Speaker);
}
-
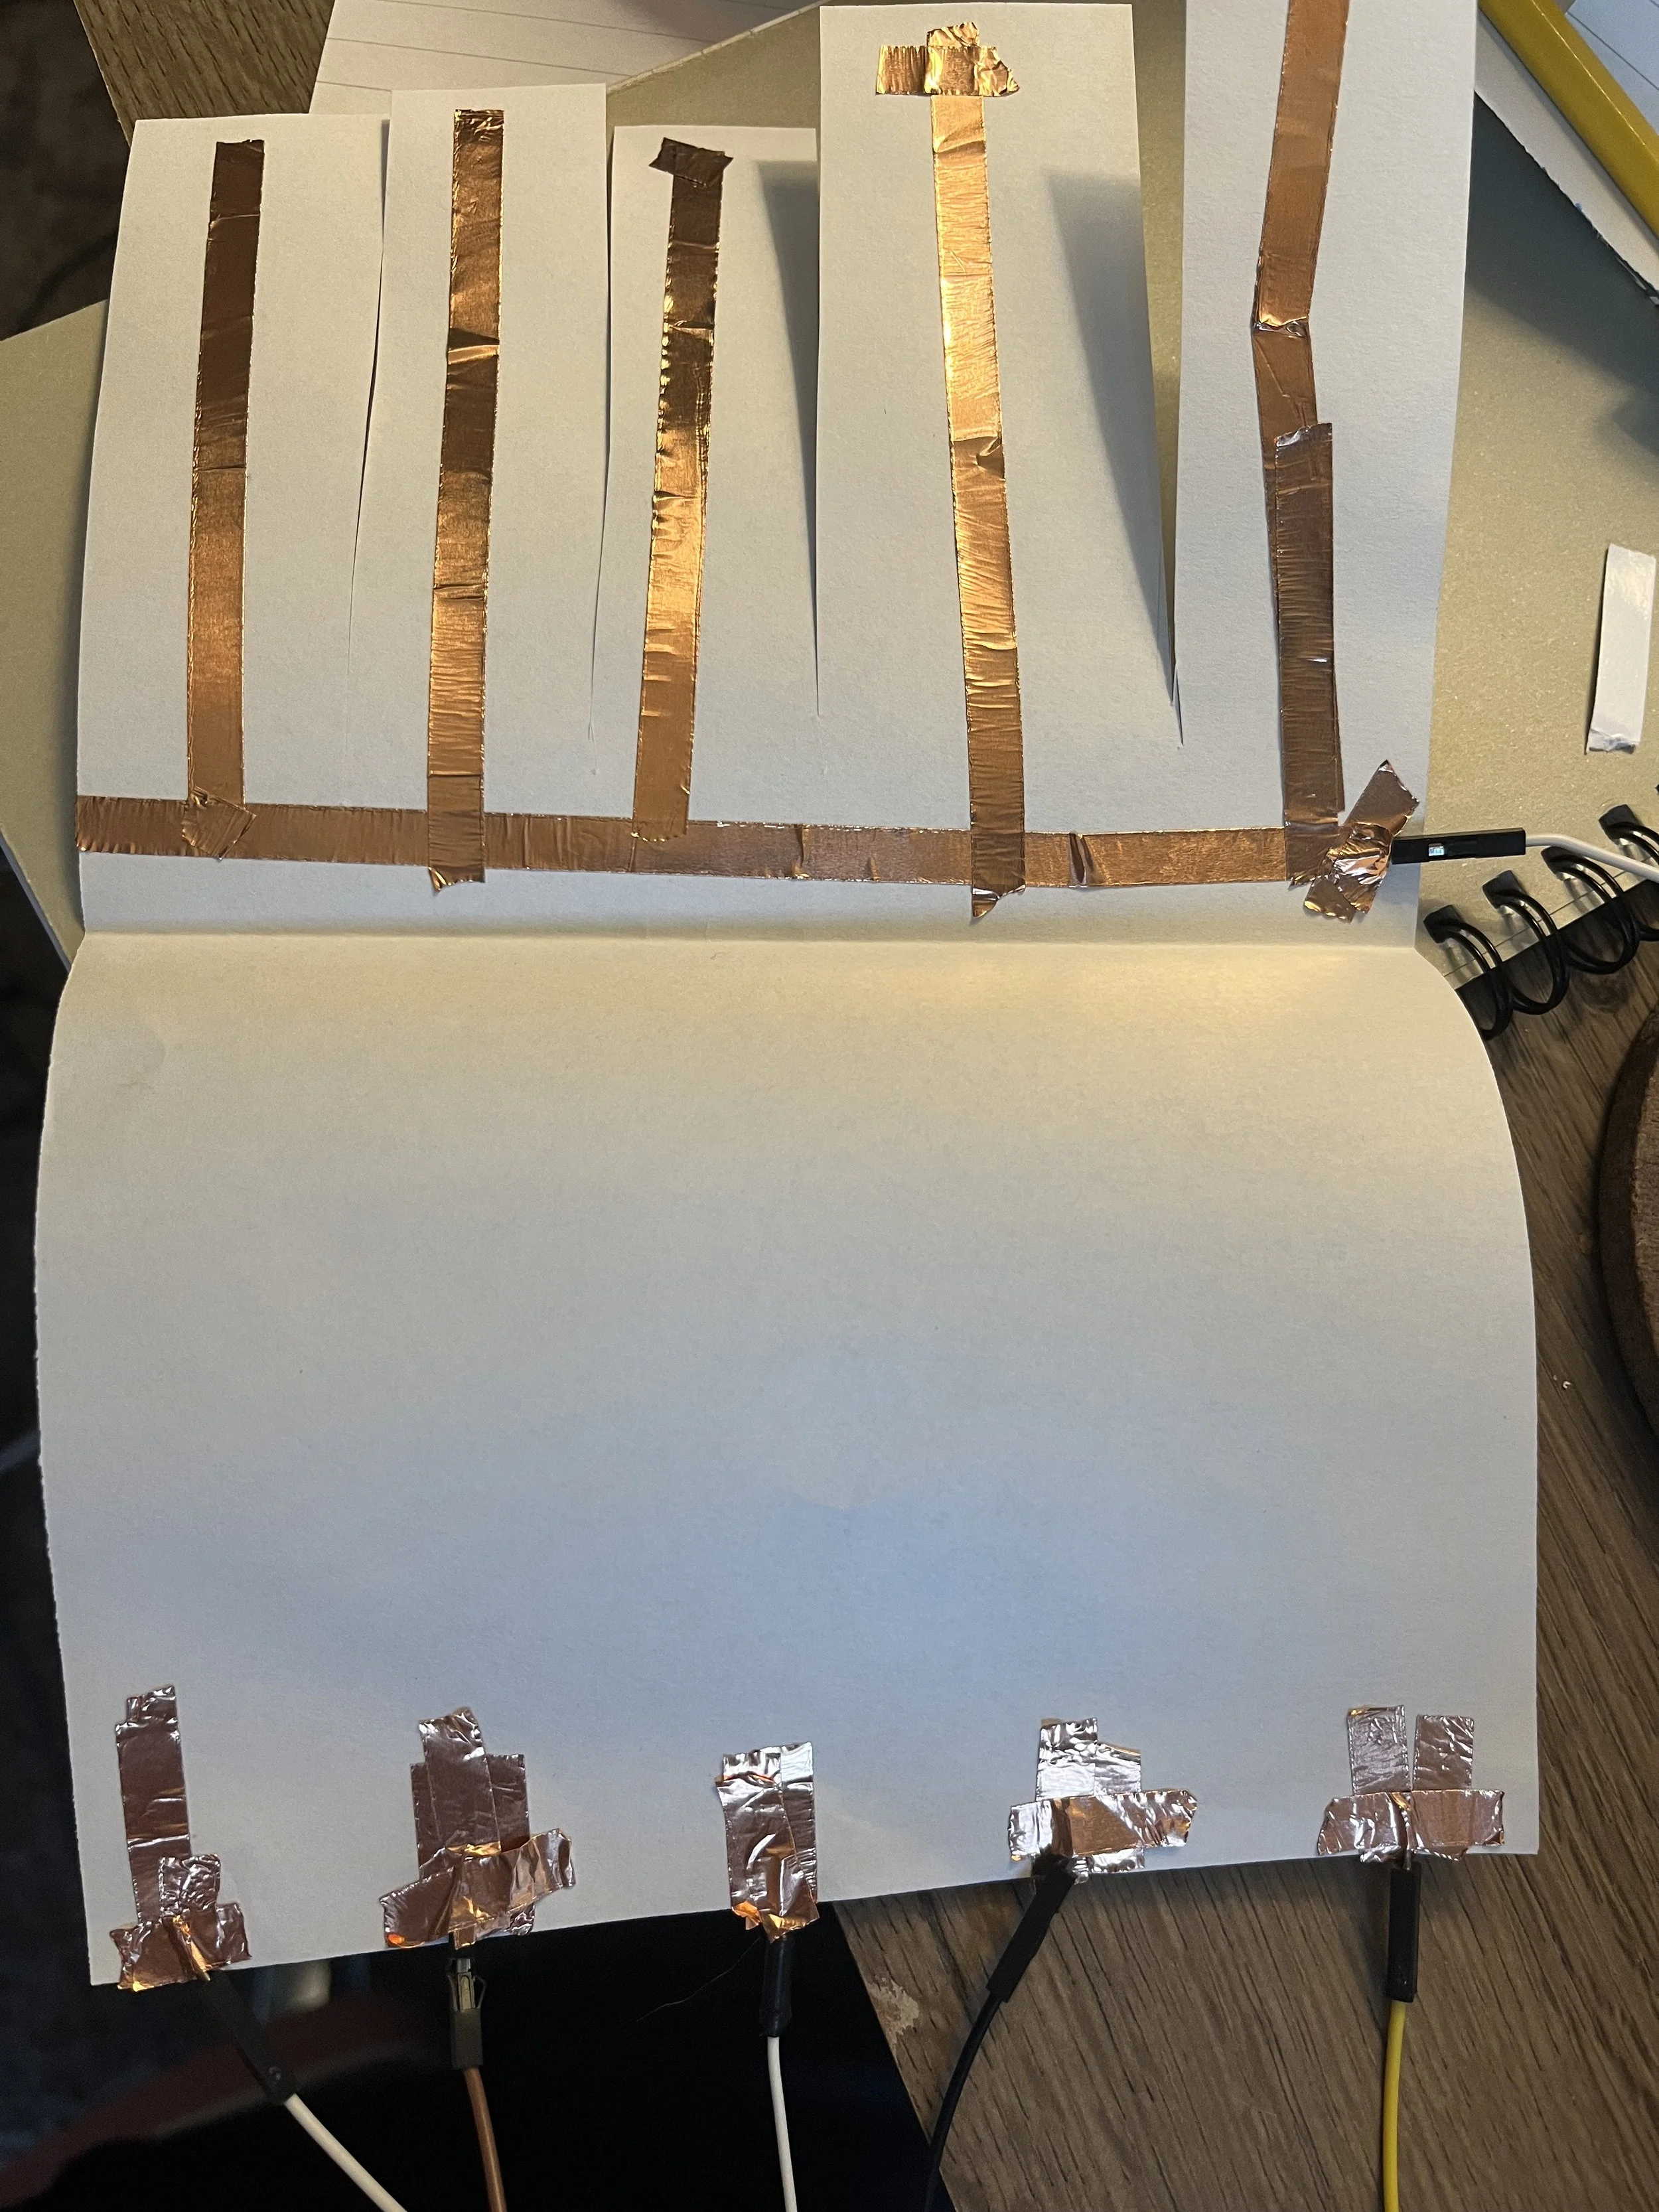
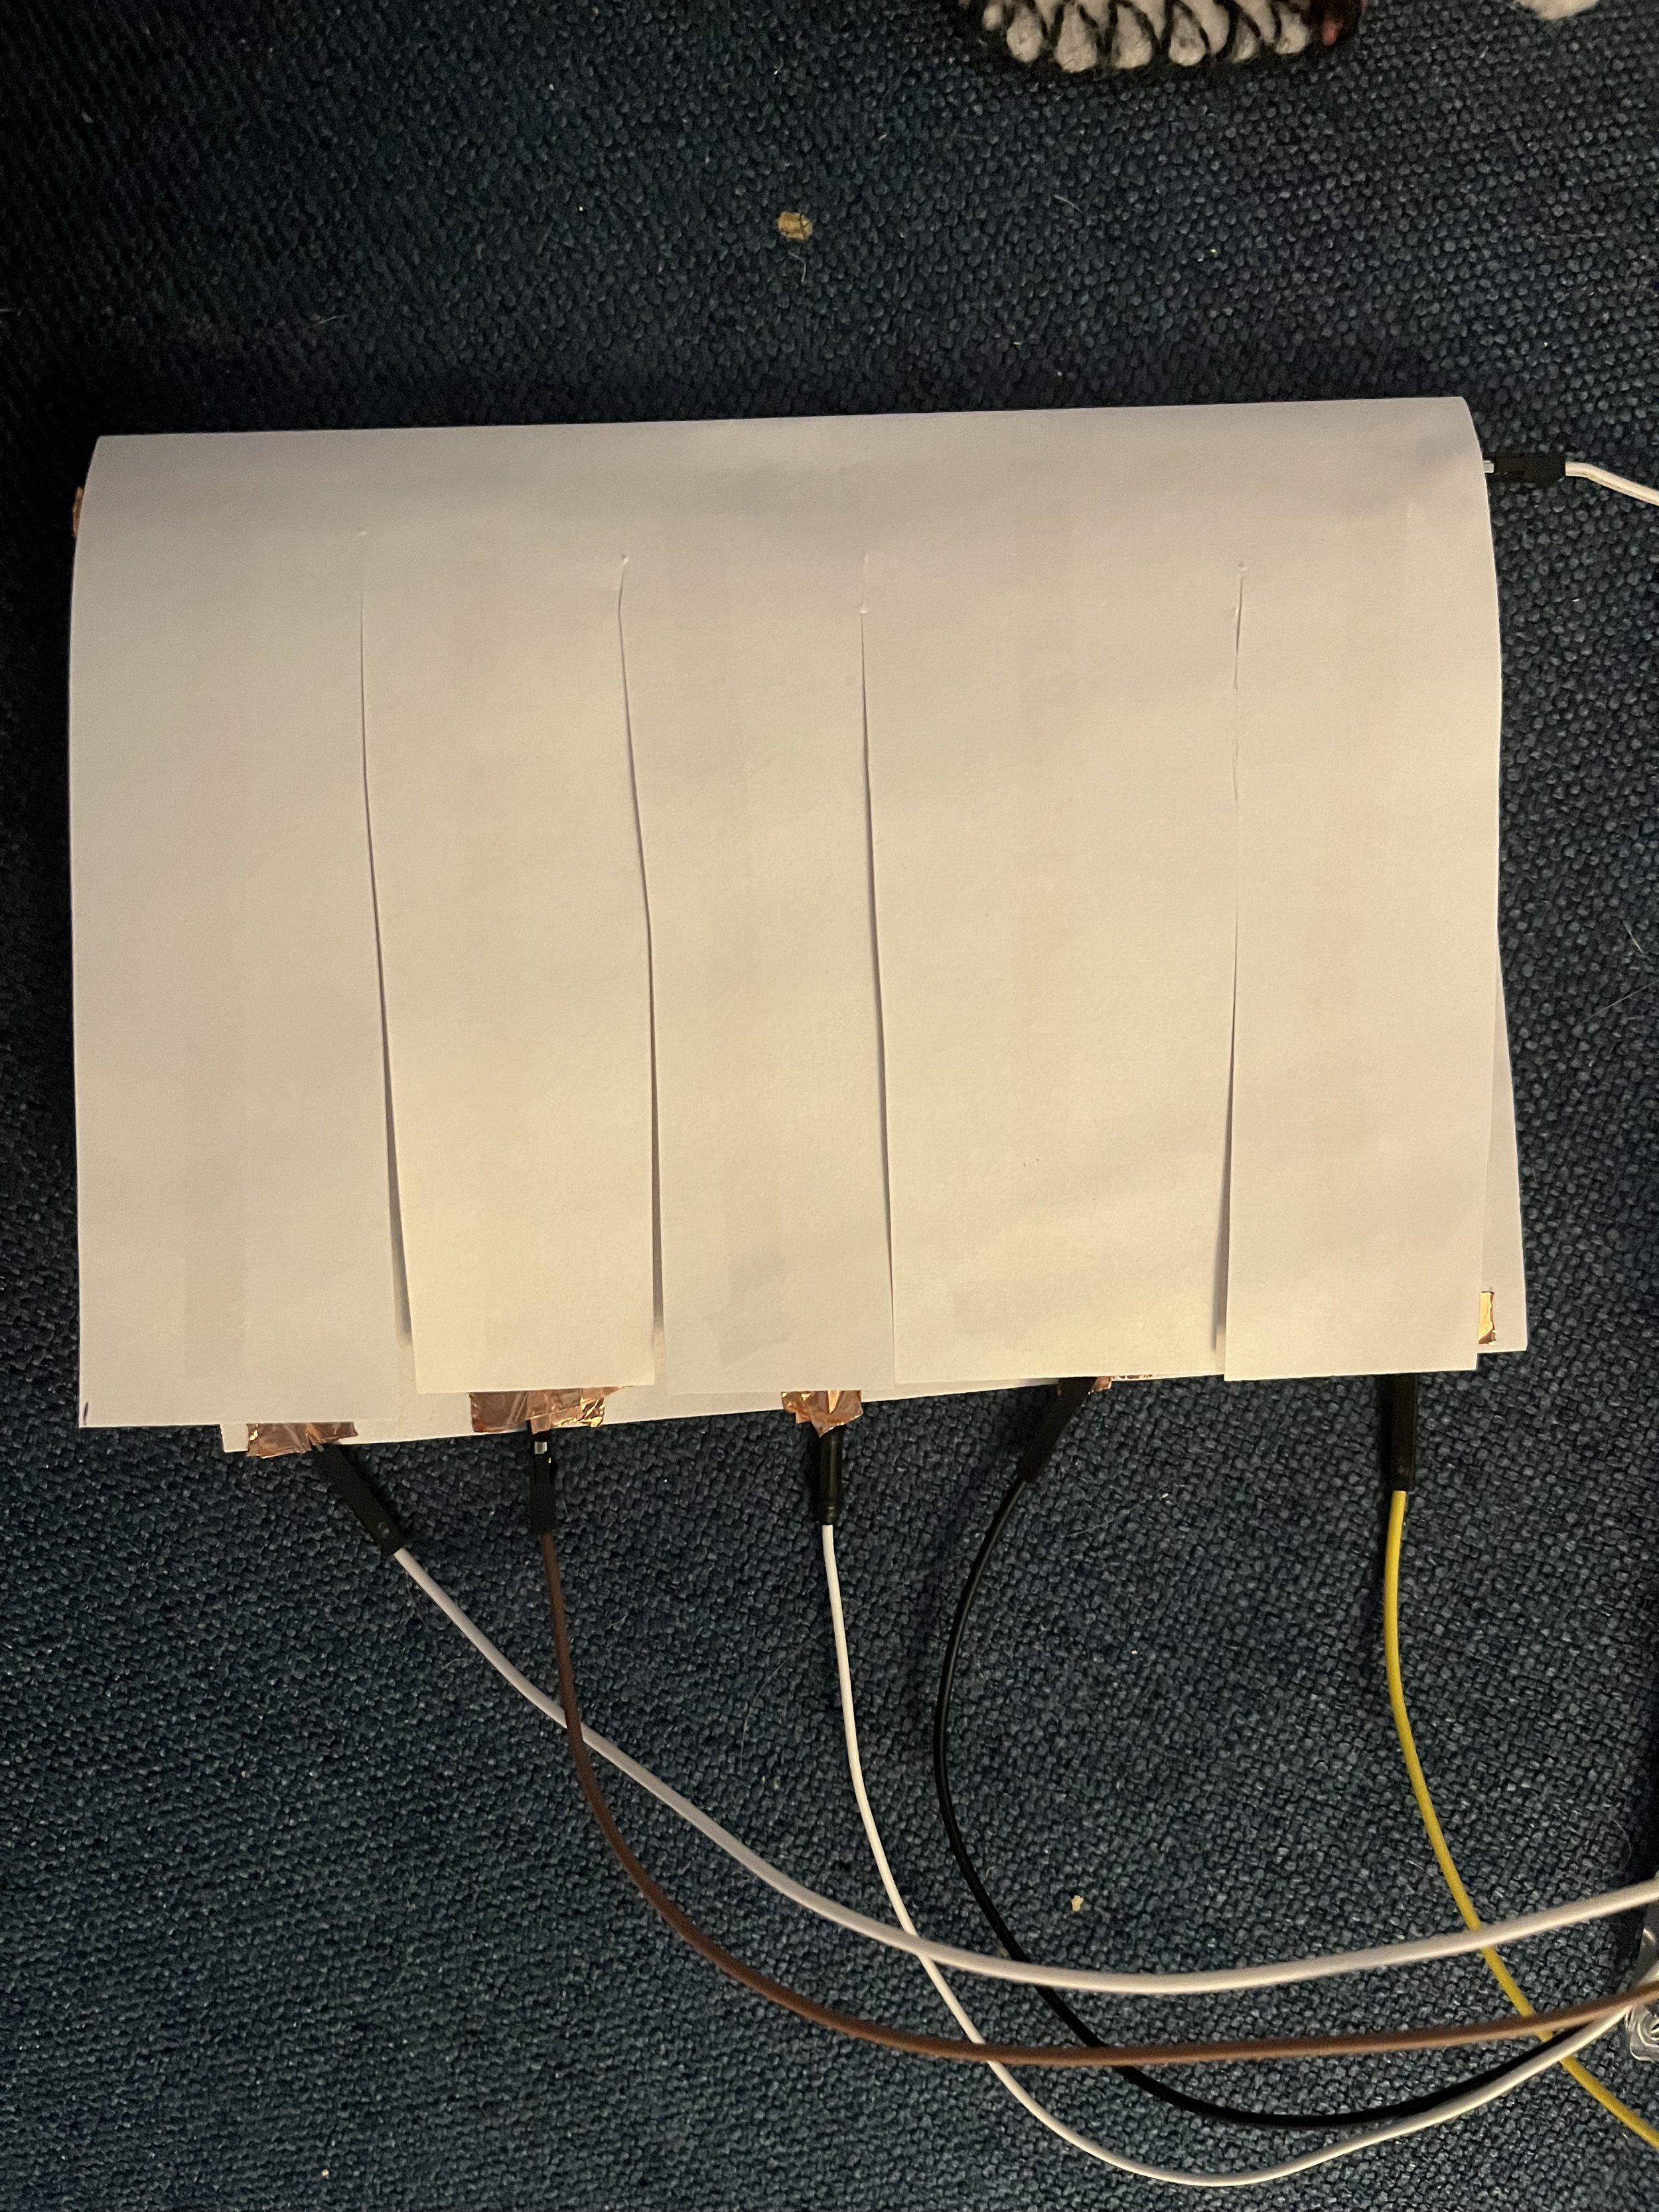
STEP 1: The Paper
Fold your paper in half
On the top half, cut slits ¾ of the way to the center
On the top half of the paper:
Lay copper tape horizontally along the length of the of the paper close to the center
Lay copper tape vertical along the “keys” you cut out
On the bottom half of the paper:
Make a square of copper tape towards the bottom long enough to reach the edge of the paper
STEP 2: Connecting the Board to the Piano
The Speaker
Connect 2 female/male wires to the speaker
Put the positive end into pin A0 and the negative end into GROUND on the Arduino Board
The Piano
Use tape or alligator clips to connect a wire from GROUND on the micro-controller to the top half of copper tape
Use the same method to connect the input PINS 2,3,4,5, and 6 to the copper tape squares at the bottom half of the piano
-
Conductive Materials: Copper tape carries current like a wire, turning paper into a circuit board.
Inputs as Keys: Each strip of tape acts as a pushbutton when touched or pressed.
Digital Input/Output: Arduino detects when a key is active and plays a corresponding tone.
Arrays: Store notes and pin assignments, allowing scalable designs (easily add more keys).
Human-Computer Interaction: Demonstrates how simple circuits and code can create playable instruments.