

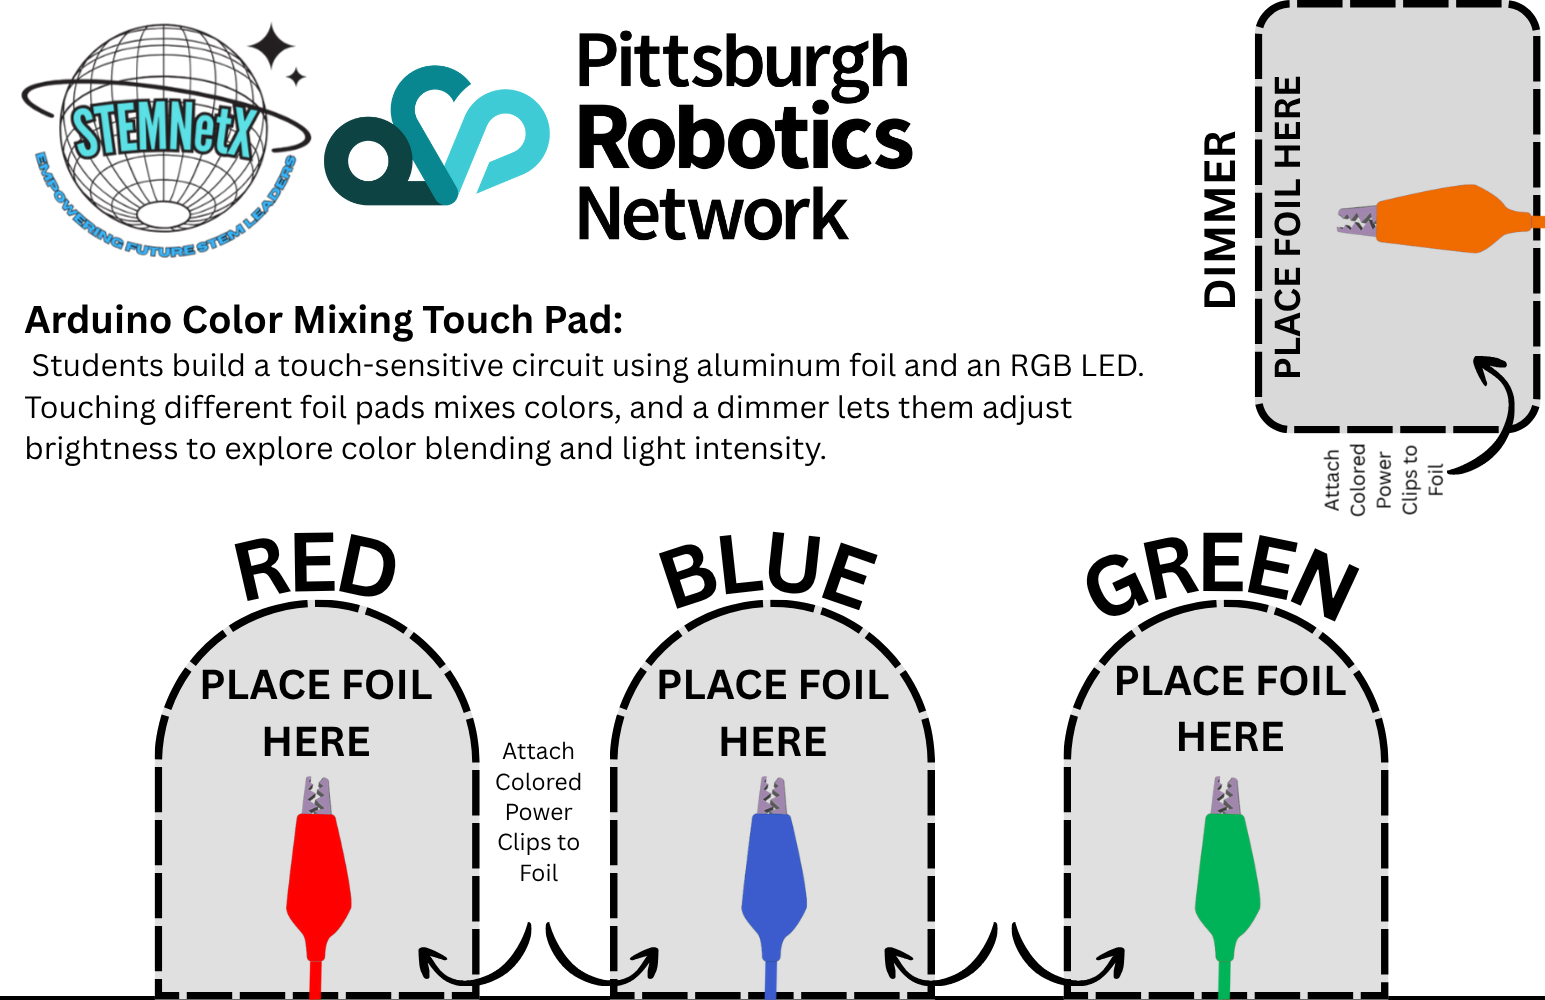
Arduino Color Mixing Touch Pad
-
1× Arduino Uno
or compatible board
1× RGB LED
common cathode recommended for this code
3× 220Ω resistors
one for each LED pin: red, green, blue
4× 10MΩ resistor
for the CapacitiveSensor library’s “send” and “receive” connection
Jumper wires
Breadboard
USB cable
to connect Arduino to your computer
Aluminum foil tape
or regular foil + tape
-
#include <CapacitiveSensor.h>
CapacitiveSensor touchRed(12, 2);
CapacitiveSensor touchGreen(12, 3);
CapacitiveSensor touchBlue(12, 4);
CapacitiveSensor touchDimmer(12, 5); // new dimmer pad
int redPin = 9, greenPin = 10, bluePin = 11;
int brightness = 255; // starts at full brightness
int threshold = 1000;
void setup() {
Serial.begin(9600);
pinMode(redPin, OUTPUT);
pinMode(greenPin, OUTPUT);
pinMode(bluePin, OUTPUT);
}
void loop() {
long rVal = touchRed.capacitiveSensor(30);
long gVal = touchGreen.capacitiveSensor(30);
long bVal = touchBlue.capacitiveSensor(30);
long dimVal = touchDimmer.capacitiveSensor(30);
bool rTouch = rVal > threshold;
bool gTouch = gVal > threshold;
bool bTouch = bVal > threshold;
// Adjust brightness if dim pad is touched
if (dimVal > threshold) {
brightness -= 63; // step down by 1/3 brightness
if (brightness <= 0) brightness = 255; // loop back to full
delay(300); // debounce so one touch doesn’t cycle too fast
}
// Scale brightness for each color
int redValue = rTouch ? brightness : 0;
int greenValue = gTouch ? brightness : 0;
int blueValue = bTouch ? brightness : 0;
setColor(redValue, greenValue, blueValue);
delay(50);
}
void setColor(int r, int g, int b) {
analogWrite(redPin, r);
analogWrite(greenPin, g);
analogWrite(bluePin, b);
}
-
1️⃣ Prepare Your Work Area
Cut a piece of cardstock or cardboard large enough to hold four foil pads.
Stick four separate aluminum foil squares or rectangles onto the cardstock.
Label them RED, GREEN, BLUE, and DIMMER.
Leave small gaps between each foil pad so they don’t touch.
2️⃣ Set Up the Arduino IDE
Open the Arduino IDE on your computer.
Go to Sketch → Include Library → Manage Libraries...
In the search bar, type “CapacitiveSensor”.
Install the CapacitiveSensor by Paul Badger library.
Open a new sketch and paste in your provided code.
3️⃣ Wire the RGB LED
Place the RGB LED on the breadboard.
Connect the common cathode (longest leg) to the Arduino GND.
Connect the other legs through 220 Ω resistors to the following pins:
Red → Pin 9
Green → Pin 10
Blue → Pin 11
4️⃣ Wire the Capacitive Touch Pads
Connect Arduino pin 12 to one side of all four 10 MΩ resistors (this is the send pin).
Connect the other end of each 10 MΩ resistor to these pins:
Red → Pin 2
Green → Pin 3
Blue → Pin 4
Dimmer → Pin 5
Use jumper wires to connect each of those pins to its matching foil pad on the cardstock.
Ensure all foil pads are isolated from each other and firmly attached.
5️⃣ Upload and Test the Code
Connect the Arduino to your computer via USB.
Select the correct board and COM port under Tools → Board and Port.
Click Upload to send the code to your Arduino.
Touch the RED, GREEN, or BLUE foil pads to turn on that color of the LED.
Touch two or more pads at once to mix colors.
Touch the DIMMER pad to cycle through three brightness levels.
6️⃣ Troubleshooting Tips
If colors don’t respond, lower the threshold value in the code.
If lights flicker or trigger randomly, increase the threshold or use shorter wires.
Make sure all connections are tight and the foil isn’t overlapping.
You can adjust the brightness step size by changing brightness -= 63; in the code.
-
Electricity & Conductivity – how current flows through conductive materials like aluminum foil.
Capacitance & Sensors – how touching the foil changes capacitance and can be measured by a microcontroller.
Light & Color Mixing – additive mixing of red, green, and blue to create new colors.
Analog Output & PWM – controlling LED brightness using pulse-width modulation.
Programming & Logic – using code to respond to sensor inputs and control hardware.
Energy Transformation – converting electrical energy into light energy in LEDs.
Engineering Design & Iteration – testing, troubleshooting, and refining circuits and code.